
Custom printed circuit boards have become more and more accessible to the average hobbyist over the last decade. But one problem still remains: your circuits will take at least a couple days to make. But what if you needed some really rapid prototypes? [The Raccoon Lab] shows us how to do it with a 3D printer.
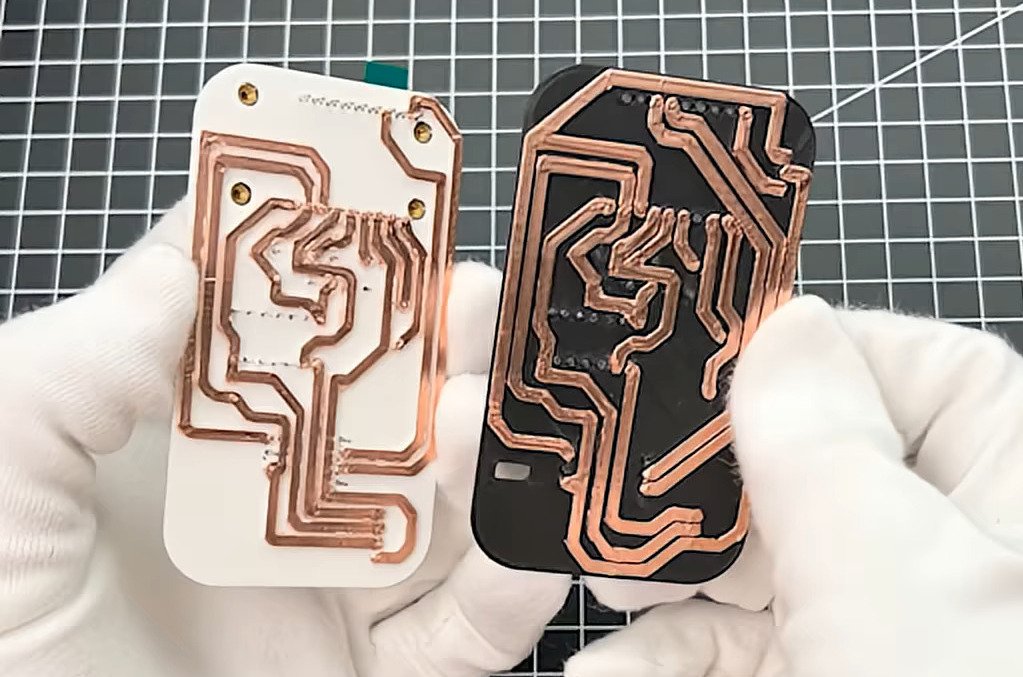
You start with the usual hobby PCB pipeline: take your idea, make a schematic, and then lay it out in KiCad. That’s where the changes start: to keep traces strong, they are made very thick. The PCB is then exported and opened in 3D CAD software, where the traces are extruded to be 2 mm tall. Off to the printer! The newly printed “circuit board” is made conductive by applying copper tape to it, and traces are cut out along their raised edges.
The result is a very quick and dirty PCB. Sure, it isn’t exactly production-ready, but for just about any simple microcontroller project it’ll do just fine, and it’s a whole lot more accessible than milling one using a CNC! We’ve seen a few variations on this approach recently, including some custom software designed to help along the process.
This articles is written by : Fady Askharoun Samy Askharoun
All Rights Reserved to Amznusa www.amznusa.com
Why Amznusa?
AMZNUSA is a dynamic website that focuses on three primary categories: Technology, e-commerce and cryptocurrency news. It provides users with the latest updates and insights into online retail trends and the rapidly evolving world of digital currencies, helping visitors stay informed about both markets.
